
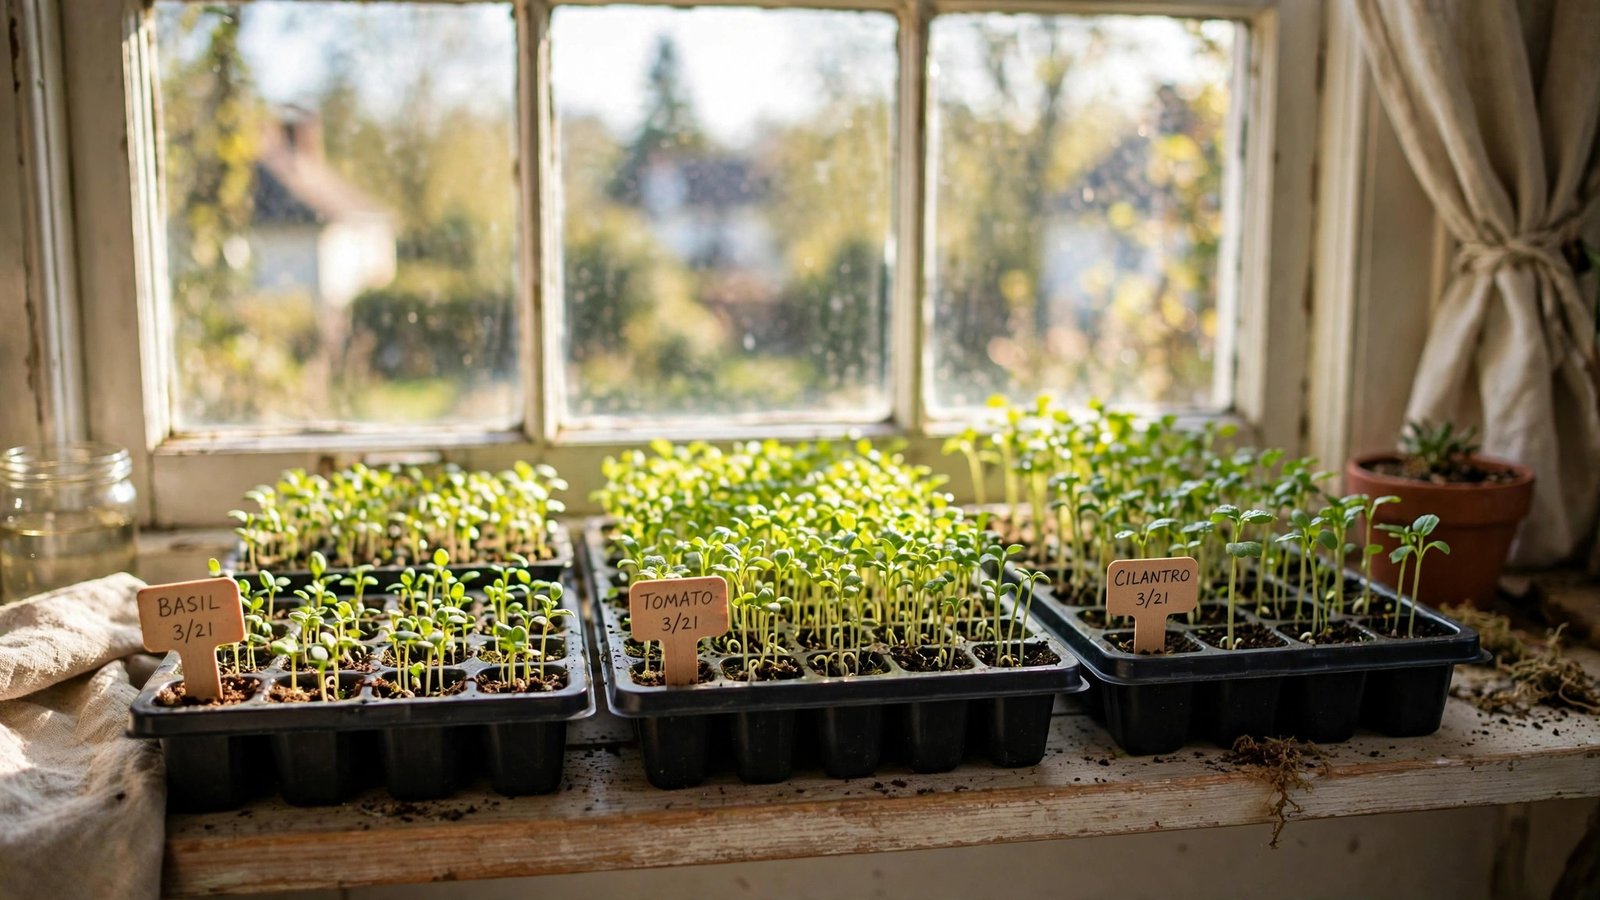
Starting seeds indoors is the gardener’s superpower: it stretches your growing season by weeks, saves serious money (a $4 seed packet grows what $60 of transplants would cost), and gives you varieties no garden center carries. And despite its reputation for grow lights and heating mats, the easy way needs none of that — just a sunny window, basic supplies, and timing.
This is the stripped-down method that works for beginners: no special equipment, no jargon, just seeds becoming plants. Here’s how to start seeds indoors the easy way.
What You Actually Need (Under $25)
- Seeds: start with easy winners — tomatoes, peppers, basil, lettuce, marigolds, zinnias. Check the packet’s “days to germination” and “start indoors X weeks before last frost.”
- Containers: anything 2–3 inches deep with drainage holes — yogurt cups, plastic clamshells, or cheap cell trays. Wash reused containers with diluted bleach to prevent damping-off disease.
- Seed-starting mix: not garden soil, not potting soil — seed-starting mix is finer, sterile, and drains properly. One bag ($6–$8) starts hundreds of seedlings.
- A sunny window or basic light: a south-facing window works for the easy method; a $25 shop light on a timer works even better (see below).
- Plastic wrap or a humidity dome: keeps moisture in until germination.
- A spray bottle: for gentle watering that doesn’t dislodge seeds.
Skip: heating mats (nice but optional — most easy seeds germinate at room temperature), fancy self-watering systems, and expensive “seed starting kits” that are just repackaged basics.
Timing: The Only Math You Need
Find your area’s average last spring frost date (your local extension service or the Old Farmer’s Almanac’s frost-date tool). Then read each seed packet: “start indoors 6–8 weeks before last frost” means count backward from that date. Starting too early produces leggy, stressed transplants; starting too late wastes the head start.
Easy timing examples (adjust to your zone): tomatoes 6–8 weeks before last frost, peppers 8–10 (they’re slow), basil 4–6, lettuce 4–6, marigolds 4–6. When in doubt, slightly late beats very early.
The 7-Step Easy Method
- Fill containers with pre-moistened seed-starting mix (damp like a wrung sponge, not soggy). Leave half an inch at the top.
- Plant at the right depth: the rule is 2x the seed’s width deep. Tiny seeds (lettuce, basil): press onto the surface, barely covered. Medium (tomatoes, peppers): quarter-inch deep. Large (beans, squash): half to one inch.
- Label everything: variety and date. You will not remember; nobody does. Popsicle sticks and a marker.
- Cover with plastic wrap or a dome to hold humidity. No light needed yet — seeds germinate in the dark.
- Keep at room temperature (65–75°F). Top of the fridge is a classic warm spot. Check daily; remove the cover at the first sign of sprouting.
- Light immediately after sprouting: move to your brightest window or under lights. This is the critical step — seedlings without enough light stretch tall, pale, and weak (legginess) within days.
- Water gently: mist or bottom-water (set trays in a shallow water bath for 10 minutes). Keep mix consistently moist, never waterlogged. Overwatering kills more seedlings than underwatering.
Light: The Make-or-Break Factor
A sunny windowsill works for the easy method — but “sunny” means 6+ hours of direct sun, and seedlings need light close: within 2–3 inches. Stretch a hand between window and seedling; if your hand’s shadow is faint, light is insufficient.
The $25 upgrade that changes everything: a basic LED shop light (5000K “daylight”) hung on chains 2–3 inches above the seedlings, on 14–16 hours daily via a timer. Raise it as they grow. This single upgrade produces stockier, healthier transplants than any windowsill — and it’s the difference between “survived” and “thrived.” Rotate trays daily if using a window so seedlings don’t lean.
The USDA’s gardening resources and your local cooperative extension offer region-specific seed-starting calendars — free expertise tuned to your exact climate.
After Sprouting: The Care Routine
- Thin ruthlessly: one seedling per cell. Snip extras at soil level (don’t pull — it disturbs roots). Crowded seedlings all suffer.
- Air circulation: a small fan on low nearby (not blasting directly) strengthens stems dramatically and prevents fungal disease. Sturdy stems now mean sturdy transplants later.
- Feed lightly: once true leaves appear (the second set — the first “leaves” are seed leaves), start half-strength liquid fertilizer weekly. Seed mix has no nutrients; seedlings need food once they’re growing.
- Brush them: gently running your hand over seedlings daily mimics wind and builds stem strength — a real, research-backed trick.
Hardening Off: Don’t Skip This
Indoor seedlings moved straight outside suffer transplant shock — sunburn, wind damage, wilting. Harden off over 7–10 days: day 1–2, one hour of shade; gradually increase sun and time; by day 7–10, full days outside, nights too if frost-free. Then transplant on a cloudy day or late afternoon, water deeply, and mulch.
This step feels tedious and matters enormously — it’s the difference between seedlings that stall for two weeks and ones that take off immediately. If you’re working with limited space, starting a balcony garden pairs perfectly with indoor seed starting — your seedlings become container plants.
Troubleshooting: The Usual Suspects
- Leggy, pale seedlings: not enough light. Move lights closer or seedlings to a brighter spot; it can’t be fixed retroactively, but new growth will be stocky.
- Damping off (seedlings keel over at soil level): fungal disease from overwatering and poor airflow. Prevention: sterile mix, bottom-watering, fan, not overcrowding. No cure — start over with better conditions.
- No germination: old seeds, too cold, planted too deep, or dried out. Test old seeds on a damp paper towel first; keep mix consistently moist.
- Mold on soil surface: usually harmless saprophytic mold from overwatering — let the surface dry, improve airflow, sprinkle cinnamon (a mild antifungal) if it bothers you.
And once they’re growing strong, keeping your herb harvest fresh ensures none of your indoor-started bounty goes to waste.
Quick-Reference Starting Calendar
Count backward from your last frost date — here are the most common windows:
- 10–12 weeks before: peppers (slow germinators), onions from seed, celery.
- 8–10 weeks before: eggplant, leeks, slow perennials.
- 6–8 weeks before: tomatoes, basil, marigolds, zinnias — the classic batch.
- 4–6 weeks before: cucumbers, squash, melons, lettuce, herbs (fast growers that get leggy if started too early).
- Direct sow instead: beans, peas, carrots, radishes, corn — these resent transplanting or grow so fast indoors is pointless.
Tape this list inside a cabinet door. Next year, timing becomes automatic — and you’ll wonder why seed starting ever seemed complicated.
Frequently Asked Questions
What are the easiest seeds to start indoors?
Tomatoes, basil, lettuce, marigolds, and zinnias — fast germinators, forgiving of beginner mistakes, and dramatically cheaper than buying transplants. Peppers are worth it but slower; start them earliest.
Do I need a grow light?
Not strictly — a truly sunny window works. But a $25 shop light produces dramatically better seedlings and removes all guesswork about light adequacy. It’s the highest-ROI upgrade in seed starting.
Why are my seedlings tall and floppy?
Insufficient light — the number-one beginner issue. Seedlings stretch toward weak light. Get lights closer (2–3 inches), increase hours to 14–16, and add a gentle fan for stem strength.
When do I transplant seedlings outside?
After your last frost date, after 7–10 days of hardening off, when seedlings have several sets of true leaves and sturdy stems. Warm-season crops (tomatoes, peppers) also want nighttime temperatures reliably above 50°F.
The Bottom Line
Starting seeds indoors the easy way is seven steps: right timing from your frost date, moist seed mix in labeled containers, correct planting depth, warmth until sprouting, strong light immediately after, gentle watering and feeding, and hardening off before transplant. A $25 setup, a sunny spot or shop light, and a little daily attention — and spring starts weeks early, for pennies per plant.